
Autumn is coming in fast and to be honest I can't wait for the cinnamon candles, fairy lights and the cosy vibes...
Autumn is my favourite season, so I'll do anything to click that publish button of an autumnal post! And even better, this is a collab with the amazing EmsiRose. I will leave a link to her post at the bottom of this tutorial.
As you can see from the title, this is going to be an autumn make tutorial, but because I wanted to have a little more fun this is going to be a dramatic evening look!

To begin with, I primed my eyes with a cream shadow. I used the Maybelline Colour Tattoo in On and On Bronze to add a shimmery bronze base for the rest of my eyeshadow. This is going to intensify the rest of the colour and also stop them from creasing.
Also, as you can see I have applied some tape to the outer corner, angled up to the tail of my brow. This is going to give me a sharp and crisp line once I removed it.

For my transitional colour I used this grey from the Revolution Iconic 3 Palette. This is going to help blend the rest of the eye shadows out seamlessly. Also, it's going to add some dimension and depth to the eye socket and look your eyes look deeper set.

Next, I blended a mixture of Boxed and The Mail from the Sleek Oh So Special. I put this through the crease to help define it a little more precisely and again add a little more depth. Also, to define the shape of the eye slightly more.

To help diffuse all of the shades I applied, I ran a little of The Mail on a small fluffy blending brush. This is just going to blend any harsh edges out that we missed the first time and just to help it look seamless.

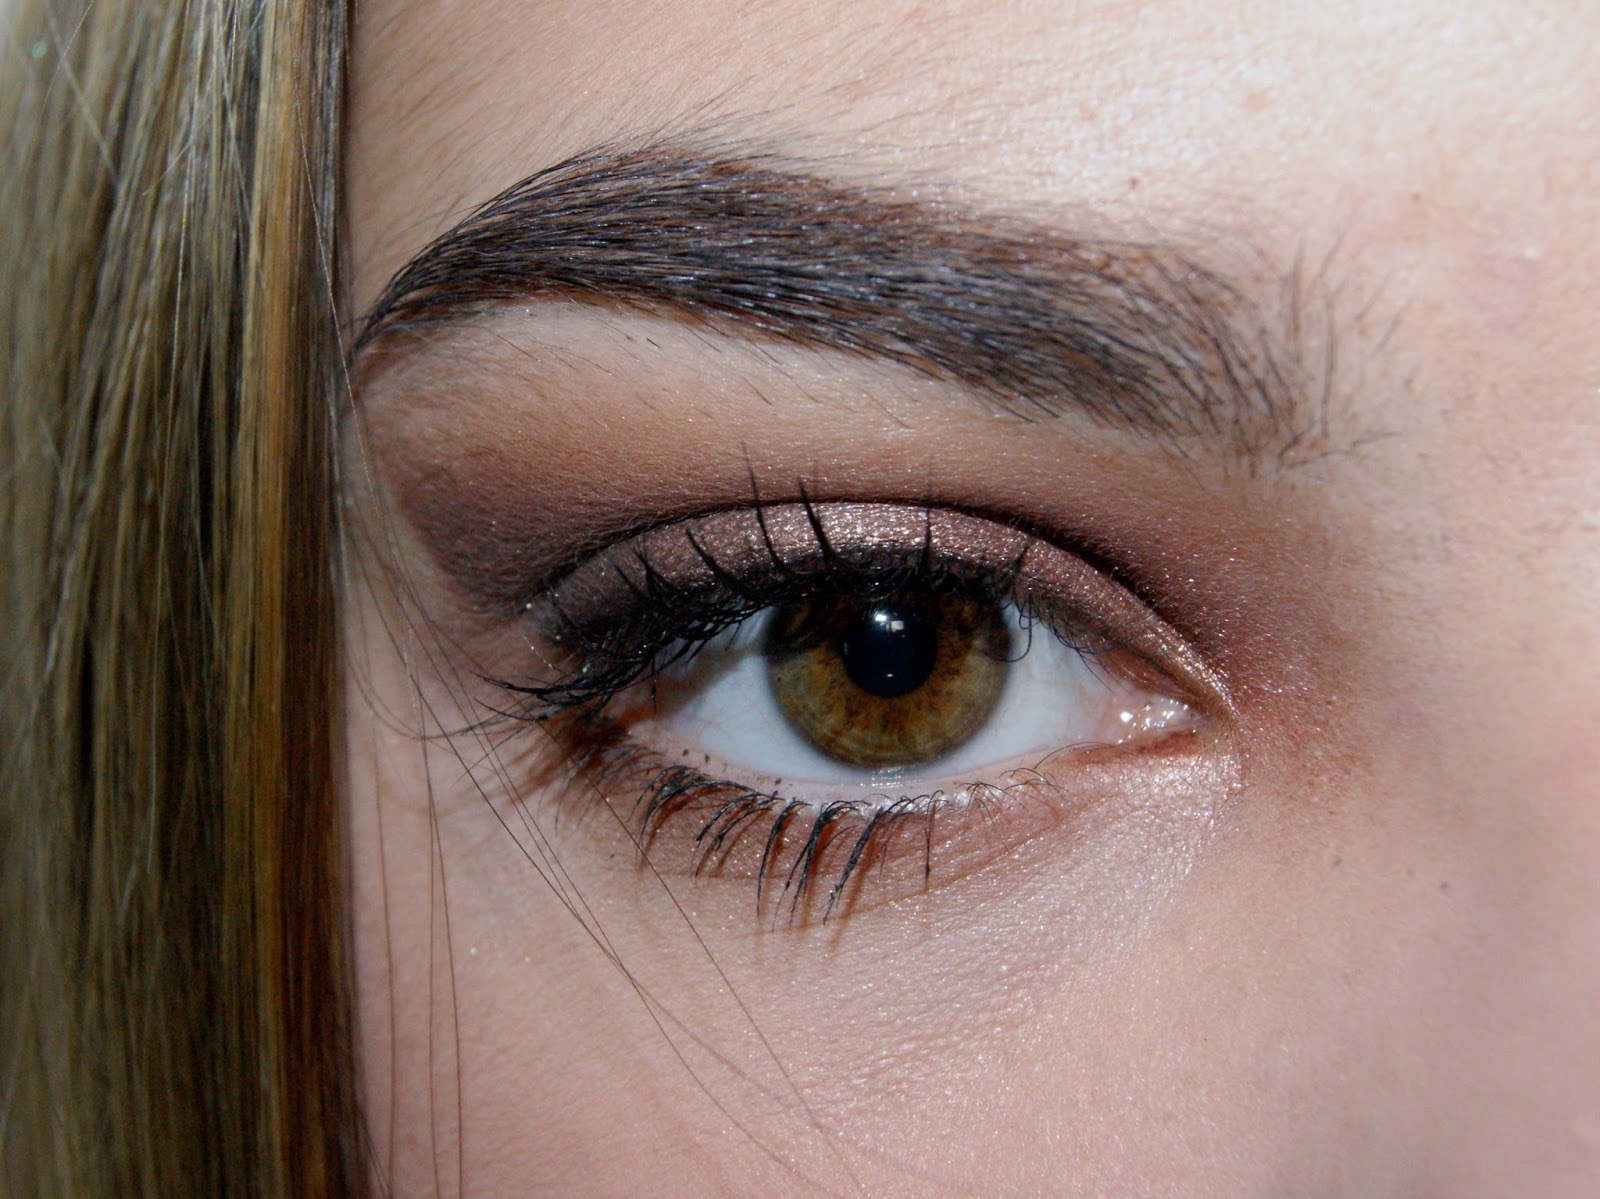
To finish of the depth of the eye, I used Noir from the same Sleek Palette and blended it carefully into the outer v, as you can see in the photo above. It just deepens up the eye the last tiny bit and darken the shadow.

Because of all the blending and darker shades, the intensity and basically all the colour of the bronze cream shadow has been lost. Therefore, I decided to add a mixture of the bright gold from the Revolution Iconic 3 and Gift Basket from the Sleek Oh So Special Palette.

To make my lashes look a little thicker and more defined I used the black called Noir from the same Sleek palette. I decided not to use a liquid liner because I thought that it would be too harsh for this look. Also, it wanted to keep it quite smudgy and smoky, reflecting the rest of the eyeshadow.
Lastly, I used the same gold from the Revolution palette that I used earlier. This is going to make me look more awake, standard, and add a little more sparkle.

Next, I removed the tape carefully. Keyword - carefully. Try not pull your eye out.
As you can see, the edge of the tape left a sharp edge.

Then I did a quick base routine. If you would like me to write a post dedicated to my everyday base routine then please leave a comment below letting me know.
To finish off my eyes I used a Zoeva Luxe Petite Crease Brush and a mixture of Boxed and The Mail underneath my eyes to help to balance out my eyelids and stop them being dragged up.
I also used my Zoeva Wing Liner Brush to line the outer edge of my lash line, as close to the lashes as possible. I used Noir from the Sleek palette again and this is just going to make my bottom lashes look a little thicker.
I also used my Zoeva Wing Liner Brush to line the outer edge of my lash line, as close to the lashes as possible. I used Noir from the Sleek palette again and this is just going to make my bottom lashes look a little thicker.

To finish off my eyes, I added a coat of Benefit Roller Lash to thicken and add more volume to my upper and lower lashes. At this point, you could always add false lashes but I choose not to, as you can see.
Also, I filled in my much needed to be done eyebrows with the Rimmel Brow This Way Wax and Power Kit. To do this, I used a Zoeva Wing Liner Brush.

If you wanted to make this look a little more casual then you could always pair it with a nude pink lip. I used the Rimmel East end Snob lip liner to line my lips, obviously, and then I filled in a little in the outer corners. Then, I used Mac Crème Cup Lipstick to fill in the rest of my lips that hadn't got product on yet. Also, I added a tiny bit of Gosh Angel lipstick to the very centre just for that ombre effect. I then blended them together a tiny bit with my finger.
Lastly, I decided to add a little highlight to my cupids bow. I used the Revolution Sugar and Spice Purple Highlight to do this.
Using a highlight is just going to make your lips look a little bigger.

However, if you want to carry on with the more autumnal vibe then go for a dark purple lip!
I first lined my lips with the Miss Sporty Pencil in 002 Solid.
Then I filled in my lips with a Gosh Lipstick in the shade Twilight. As you can see from the photo above, the colour is a deep purple without any red under tones, which makes it a true dark purple instead of berry.
You can also probably tell that I'm not the best at applying dark lipsticks yet! But I'm practising, so hopefully one day :)
Products used:
Maybelline Colour Tattoo
Revolution Iconic 3
Sleek Oh So Special
Benefit Roller Lash
Rimmel Brow This Way
Rimmel Lip Liner
Mac Crème Cup Lipstick
Gosh Angel Lipstick
Miss Sporty Liner
Gosh Twilight Lipstick
Remember to check of EmsiRose's post here!
India Jasmine
♥
No comments:
Post a Comment