

Halloween is coming up fast and I know that I'm not the only one who hasn't figured out exactly what they want be yet...
Today I'm going to be showing you a quite simple Halloween tutorial! This one is going to be cute and glamorous, so it's perfect if you don't like anything too scary.
However, on Thursday I will be uploading a more gruesome tutorial, which is what I prefer to do on Halloween!
Todays look is a pretty Sugar Skull, which is obviously a girlier style than a regular skeleton. Throughout this tutorial I'm going to try and use products that are cheap and easy to get hold of, so you have maximum ability of being able to achieve this look!
To begin with you want to start with a clean and moisturised face. To do this I just used my regular Clean and Clear Dual Action Moisturiser.
Then you want to ether use a slightly damp sponge or a paddle brush to apply a white base. I chose to use a beauty blender, simply because I didn't want to have to rewash my brushes afterwards.
For the white base I used a Smiffy Pot of white face paint. Make sure get apply this evenly across your face, right into your hairline, around your ears and down your neck.

You then want to set it in place with some sort of powder.
If your normal face powder is translucent then that's fine to set it with, but if its of your skin tone then you may want to find something else to set your base with as it will give a coloured mask to your face.
I used a little of the Gosh Prime and Set Powder as it is white and dusted it across my face with the Zoeva Powder Brush.

To cover over one of my eyebrows I am using some concealer, as I don't want the colour or texture of it to be too obvious. I am going to be painting over it and this will make it easier to do this. Then I'm just bouncing the beauty blender back over it with the white face paint to cover over the orange looking shade.

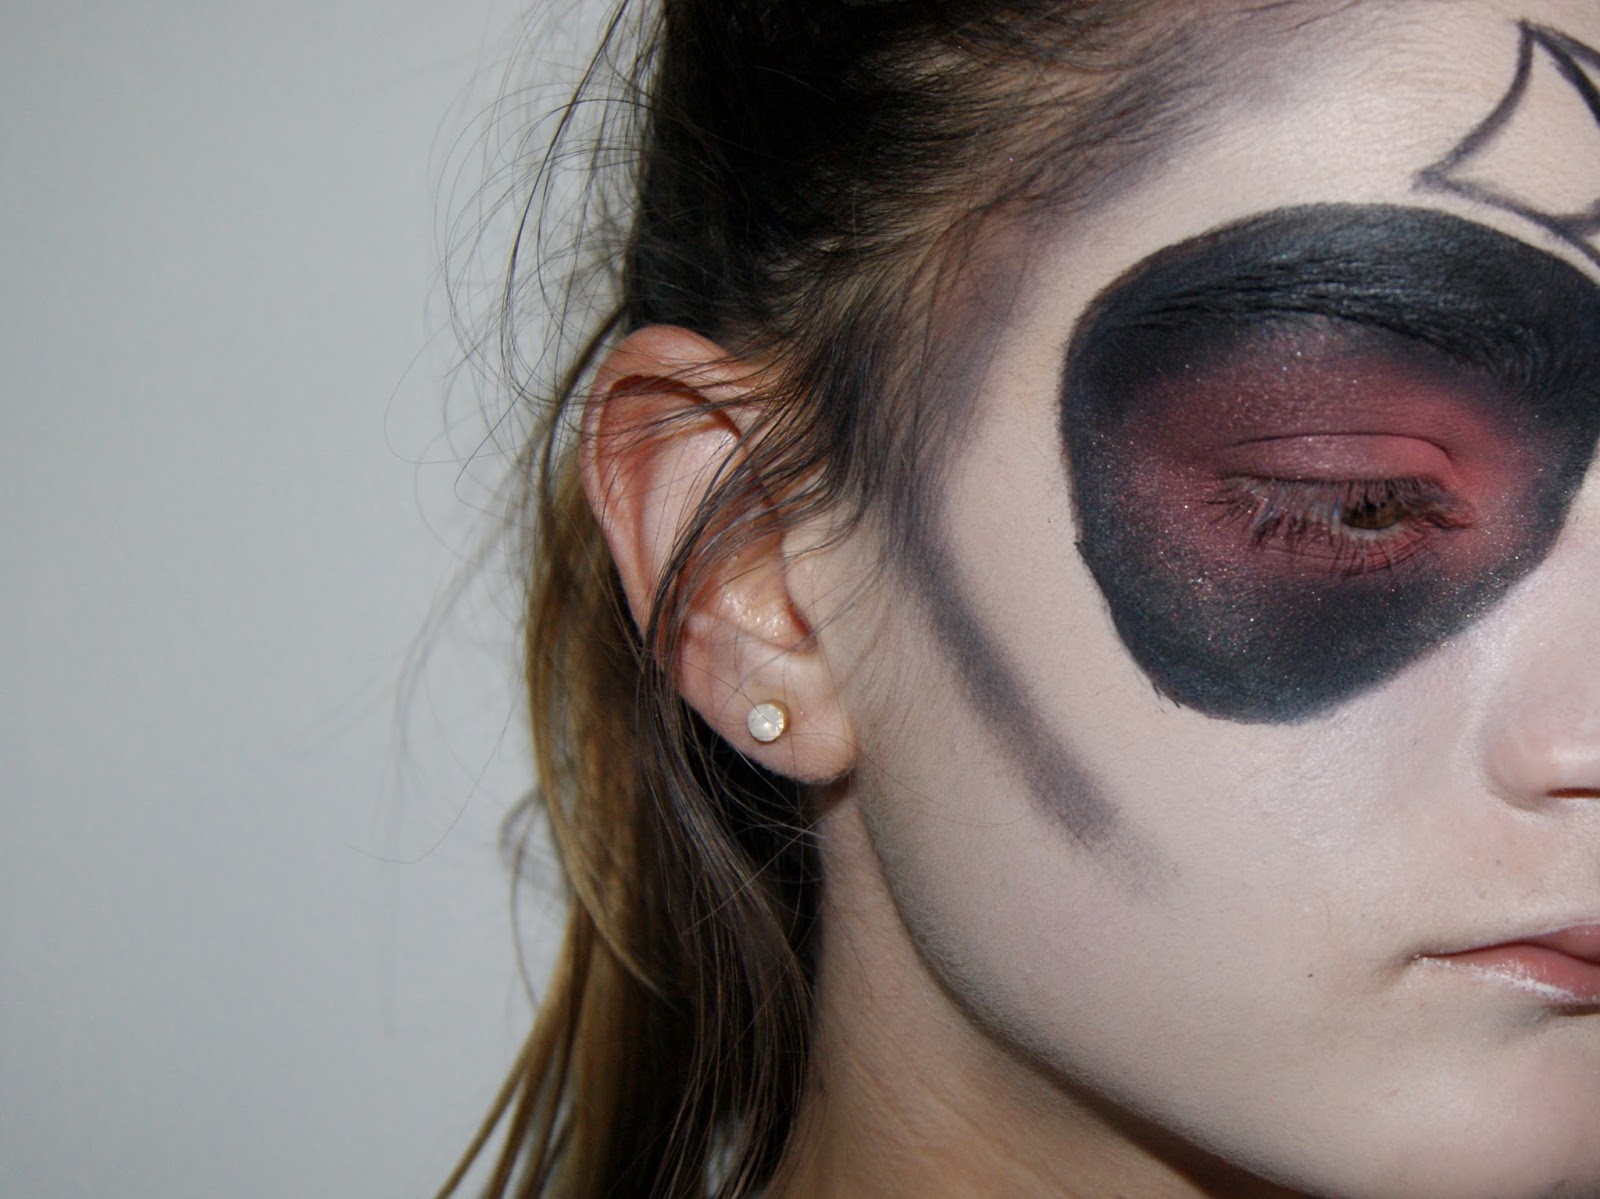
I am now outlining the area around my eye in a circular shape, as you can see from the picture below, with a black eyeshadow using a small angled brush

. I used a black face paint to then intensity the colour with the same brush, carefully applying it over top of the eyeshadow.

. I used a black face paint to then intensity the colour with the same brush, carefully applying it over top of the eyeshadow.

Then I am beginning to apply the black face paint inside the outline. I am only filling in as much as you can see on the photo below. But then I am softly blending the edges inwards, which will help the shadows to look smoother later on.


Now I'm just roughly applying a transition shade with a Zoeva Luxe Soft Definer. For this I used 'The Mail' and Boxed' from the Sleek Oh So Special Palette.


Then to brighten up my inner corner I used the shade 'Gateau' from the same palette. I applied this with the same brush!

For the rest of my eyelid I used a Kiko Eyeshadow, which annoyingly doesn't have a colour but I think that the number is 243, and I applied this with the same flat shader brush.

I am now taking a black eyeshadow and blending out the edges a little, so that they flow better and look more flawless.


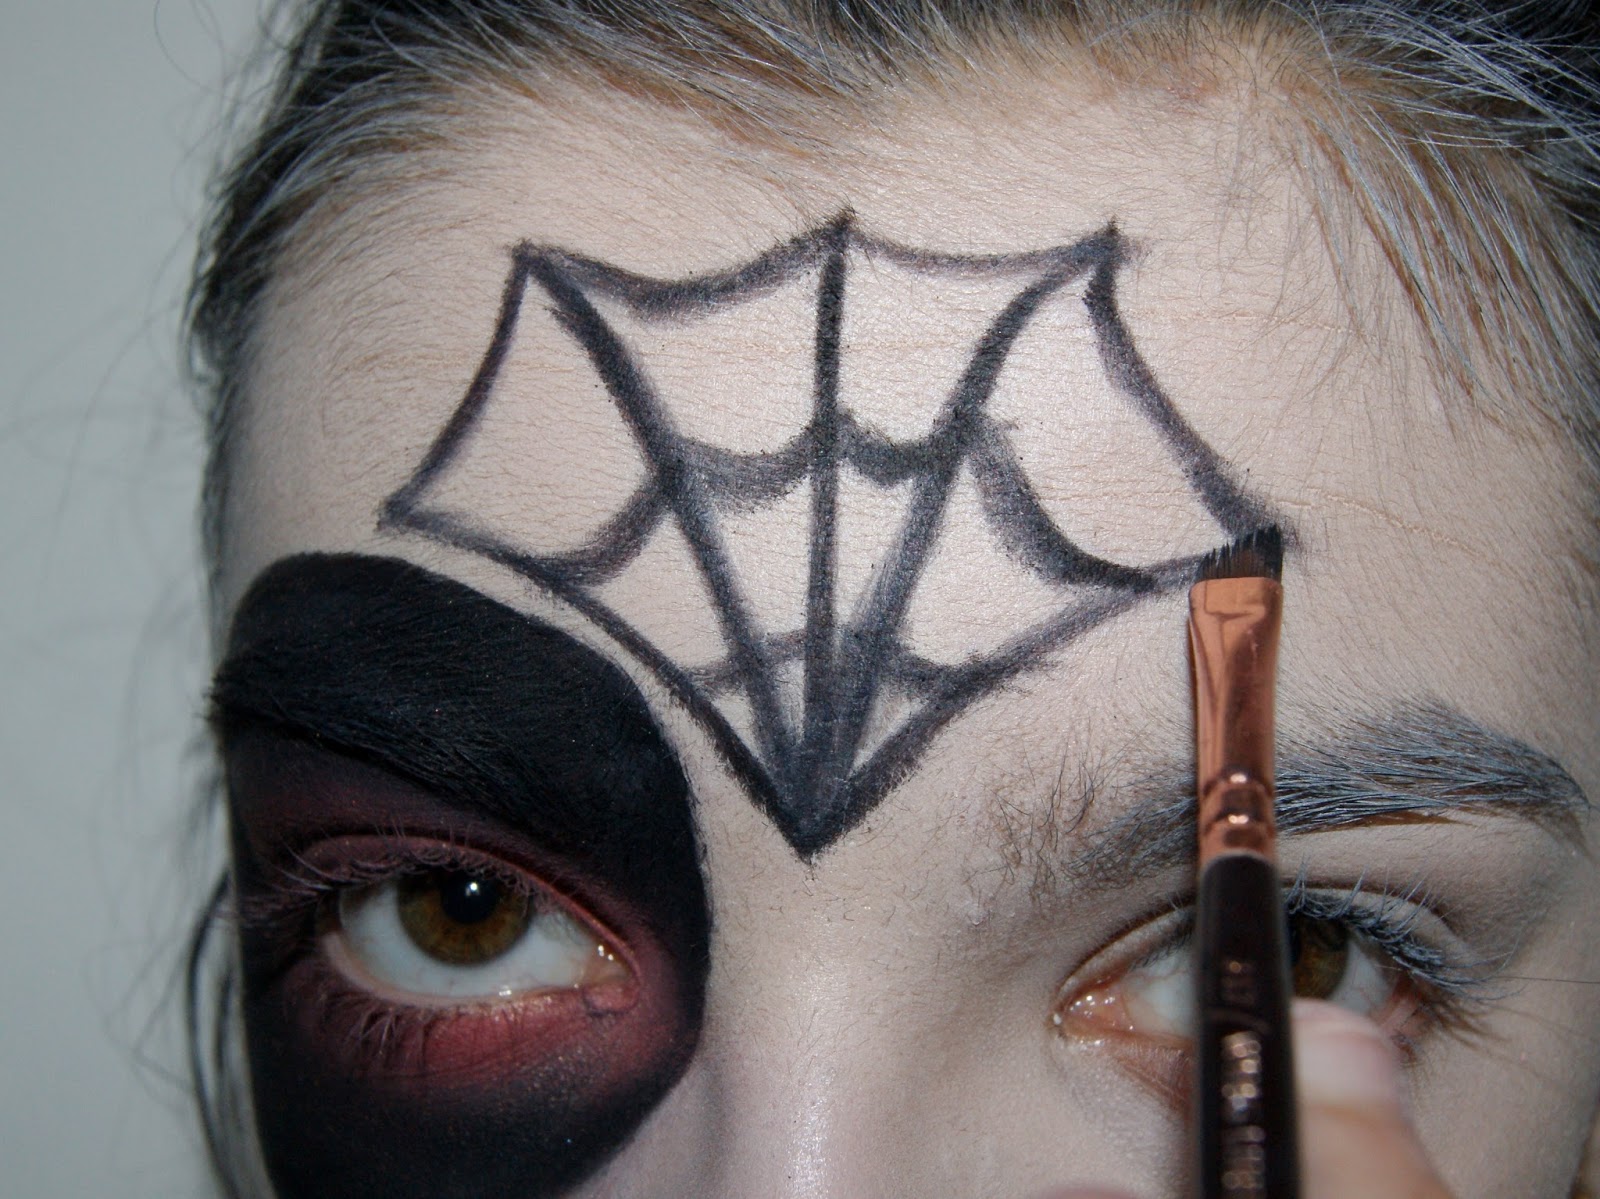
Then, I began my spider web. I used the Zoeva Wing Liner brush to create the thin lines using a black eyeshadow. I decided to draw 5 lines but you can obviously tailor it to your own taste.

Using the same brush, I then joined up the lines with curves.
This is obviously going to finish off the spider web, but also at this point you could add a gem or something at the base of the web. However, I didn't have any to hand so I skipped this step.
I then filled in my eyebrow, which was showing, with the same brush and eyeshadow. I chose to use a black as a brown wouldn't look quite right and the black would match the spiders web and other eye better.
I tried to make it look quite cartoony so I drew a straight line along the top and bottom to give this effect.

For my other eye, I applied the same shadows with the same brushes. Therefore, you can just scroll up to see the steps and complete it.
Then I just copied what was on the top onto the bottom. So, under the first half of my waterline I applied 'Ribbon' and on the outer half I applied the Kiko eyeshadow.


I then added a harsh contour line underneath by cheekbone with my usual contour shade, which is a mixture of the grey and brown from the Revolution Iconic 3. To apply and blend this slightly I used a fluffy synthetic brush.

I also dragged it up by my temples and the outer sides of my forehead to add some more dimension.
Then, to finish off the contouring, I dragged the line I had created earlier straight down to my jaw line. This will give that typical skull type of shape.

To enhance my cupids bow, I used some of the same product on a thin fluffy brush and just applied it in the line where my cupids bow dips to add back in some dimension and depth.

I am now moving onto the shape on the nose. To draw this shape I am using the Zoeva Wing Liner Brush and a black face paint from Snazaroo. As you can see, I drew two lines down the sides of nose and connected them at the bottom.

Now, I am joining the tops of the lines at a point at the base of my nose with a curved line on each side. This may sounds complicated but it's very easy as you can see from the photo below.


To finish off my eyes I am using the Benefit Roller Lash Mascara because I had got lots of powder on my eyelashes and I wanted them to be completely black again. But obviously this lengthens and adds volume to your lashes as well!

Lastly, I am moving onto my lips! To begin with I outlined them with a Miss Sporty Pencil in 002 Solid.
This is going to give some more dimension to the lipstick that I will apply next!

I am now applying Gosh Twilight Lipstick all over my lips, using the lipliner as a guide. This is going to help me stay in the lines of my lips and also make sure that it's neat and tidy.

To add a little more glamour, I am taking the shade 'Glitz' from the Sleek Palette in Oh So Special, which I used earlier. I packed this on my finger and then patted it onto the centre of my lips.
This is also acting like a highlight!

To finished off my lips, I am drawing these lines above and below my lips to give the illusion of a wider, more open mouth. I also extended a line each side of my mouth to help with the larger and wider illusion as you will see below.


And then that's it!


I hope you all enjoyed and make sure to comment below what you think of this look!
India Jasmine
♥
No comments:
Post a Comment